Creating an Electron Application for the Raspberry Pi
Hi! In this blog post, I’ll be stepping through the basic first steps involved in creating an Electron application on the Raspberry Pi computer. Specifically, I will be using the Raspberry Pi 3 Model B+, not the brand new Raspberry Pi 4 which was released a few days ago. Hopefully these instructions would work just as well for the new model, but we haven’t got our hands on one of those to try it out yet.
What is Electron?
Electron is a free, open-source, cross-platform library for developing desktop applications, based on the same Chromium rendering engine that underlies the popular Google Chrome web browser. As such, the user interface can be designed using technologies familiar to web developers, such as HTML and CSS, instead of requiring them to learn a new design stack.
Electron is also based on the Node.js JavaScript runtime engine, meaning all code in the application can be written in the same language. (Although, not all code will be run in the same context, and some may involve using unfamiliar APIs and paradigms, but we can worry about that later…)
For more information on Electron, see: https://electronjs.org/
Getting Started with a Pi
For those who don’t know, Raspberry Pi is the name for a line of very small, minimalistic, affordable computers first introduced in 2012. The current incarnation is approximately the size of a pack of playing cards.
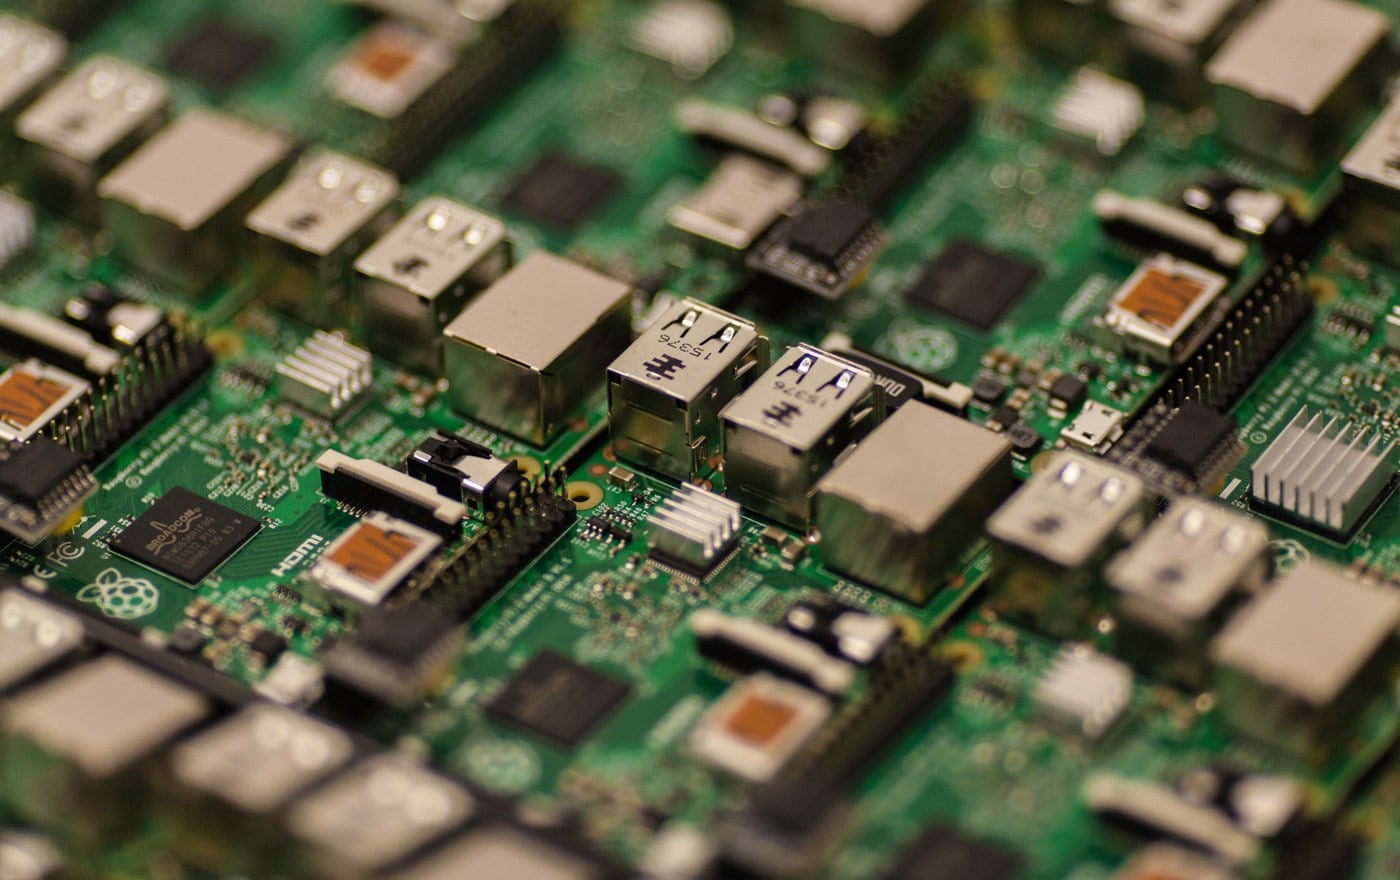
Here is the Pi I will be using:
 The Raspberry Pi 3 Model B+ used here, and a wireless keyboard/trackpad for input — of course, you can use pretty much whatever USB input devices you have to hand. There is also an official protective case available to put the Pi inside, if you don’t like looking at bare circuit boards.
I used a microSD card pre-loaded with the “NOOBS” (New Out Of the Box Software) system to install Raspbian OS, connected it to Wi-Fi and then updated to the latest version (which at time of writing is v9 a.k.a. “Stretch”.) I won’t go through the OS installation/update procedure here, but when it’s complete you should have a desktop that looks something like this:
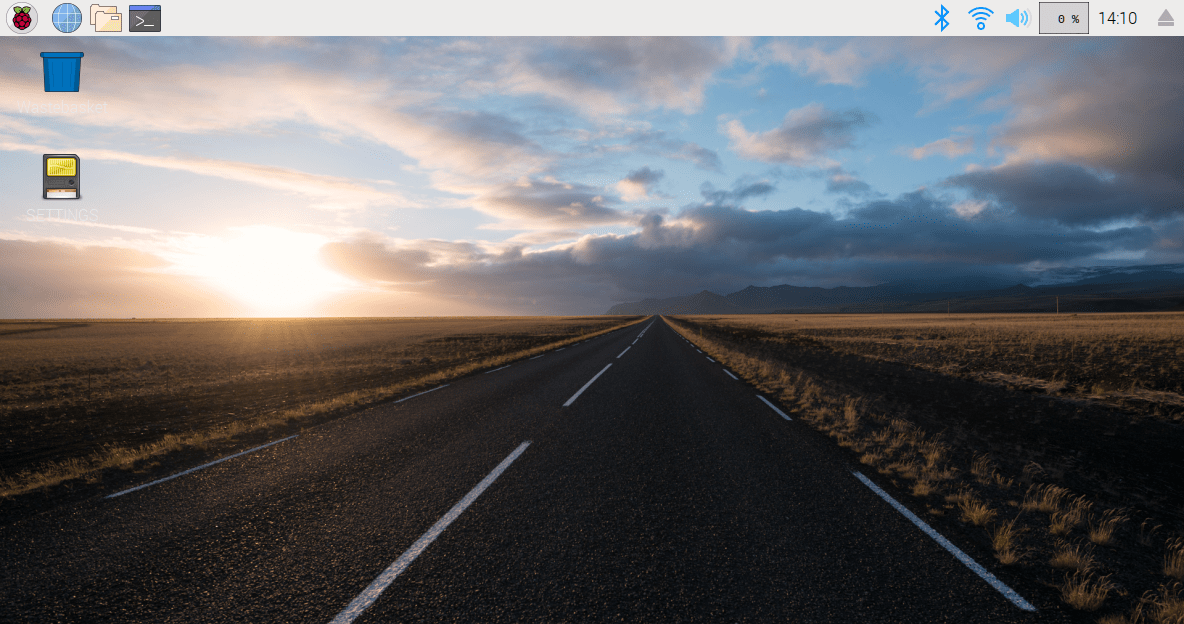 The Raspbian OS desktop, with no applications running
Installing Node.js to the System
The first thing we need to install is the Node.js runtime. This is a little tricky because we need to be certain that we get a version of Node that is compatible with the Raspberry Pi’s CPU, and the main download link we get by default if we go straight to the https://nodejs.org/ homepage may not be correct for us.
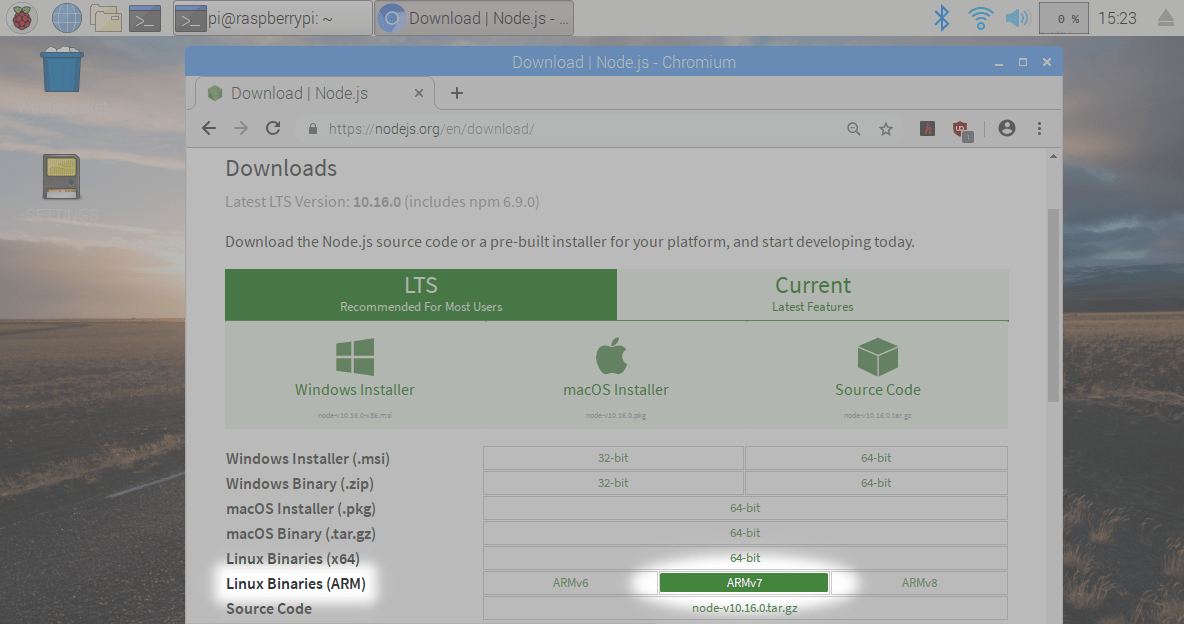
First, we can verify the type of CPU that the Pi has by opening a terminal window and entering the command uname --machine like this:
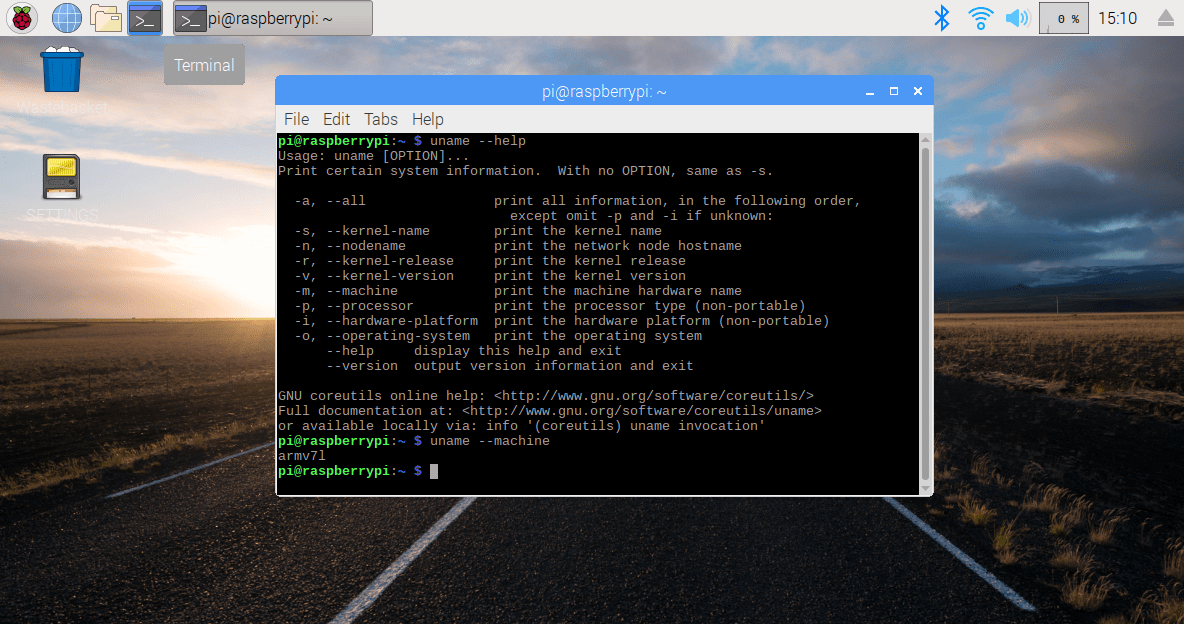
The output is arm71, which means ARM 7.1. Now we know the right kind of CPU architecture, we can download Node.js binaries for it. Go to the full Node.js downloads page and in the table of platforms, look for the row titled Linux Binaries (ARM), then across to the link for ARMv7:
The file will be downloaded into the Downloads folder. Once it is complete, go to the terminal again and use the command cd ~/Downloads. Now we are in the Downloads folder, type tar -xJf node but before you press Enter, hit the Tab key. This should autocomplete the full name of the file that you just downloaded. If all goes well, running this command should create a subfolder that contains a set of unpacked files that look something like this, if you go to them in the File Manager:

Go back to the terminal and enter this new subfolder by entering cd node and then using the Tab key again to autocomplete the rest. Now enter the following commands:
sudo cp -R bin/* /usr/local/bin/
sudo cp -R include/* /usr/local/include/
sudo cp -R lib/* /usr/local/lib/
sudo cp -R share/* /usr/local/share/
Node.js should now be present and ready to use. We can do a quick test with the command: node -v. The version number should be displayed in response.
Creating Our Application
Return to the home folder with terminal command cd ~/. Create a new folder for the application project with mkdir myapp (or choose another name) and then cd myapp. We will be using Node.js’ package manager npm to set this folder up as a Node.js app with necessary imports.
The first thing we need is a small configuration file called package.json. There is a helper tool to create this file for you: enter npm init and give answers to the questions it prompts you for, and the file will be created. You can mostly just hit Enter to use the default values here (you can always edit the generated file if you need to adjust the values later), but there are two fields that we do want to set. For “entry point: (index.js)” type in main.js, and for “test command:” type in electron . (Don’t forget the dot!)
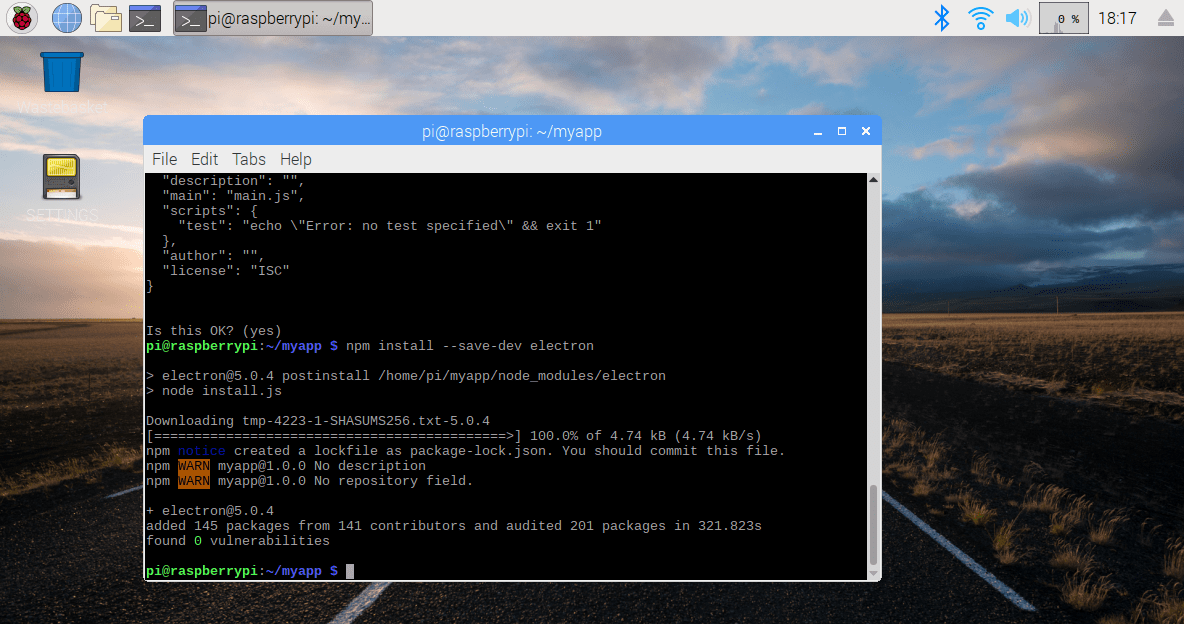
Now let’s install Electron. Enter this command:
npm install --save-dev electron
It may take a little while to download and check everything. If all goes well the terminal window should look something like this:
Go to the application launch menu by clicking the Raspberry Pi logo in the top-left hand corner of the screen. Through the Programming menu, select Geany Programmer’s Editor. Using this editor we will create two text files to be saved them in the myapp/ folder we created earlier.
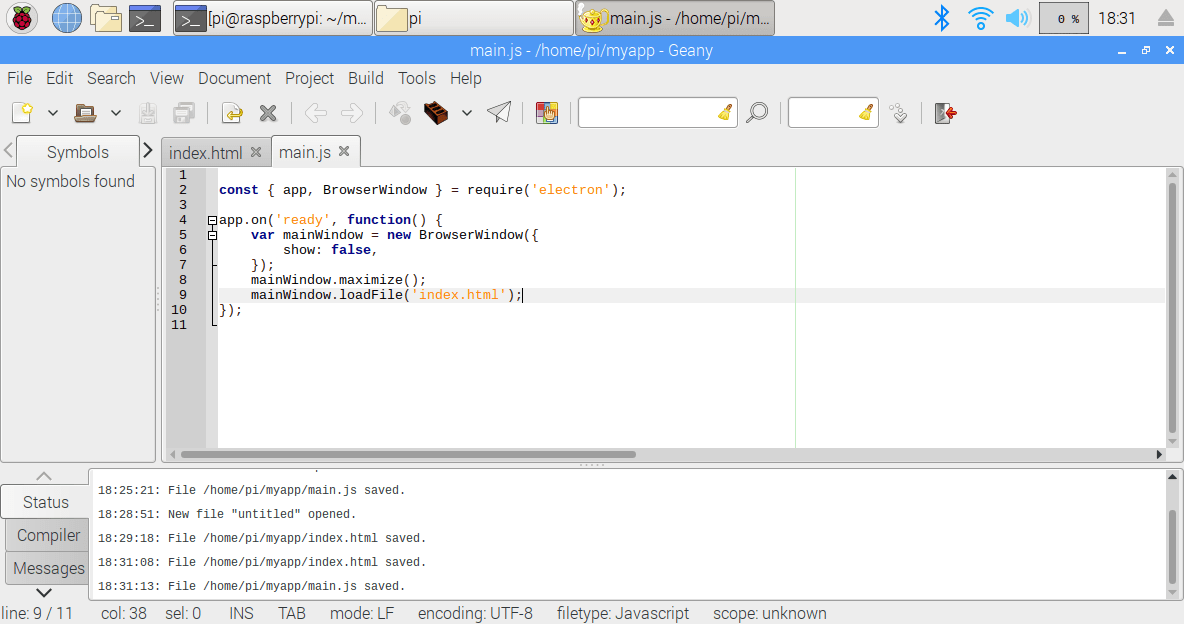 Using Geany to edit files
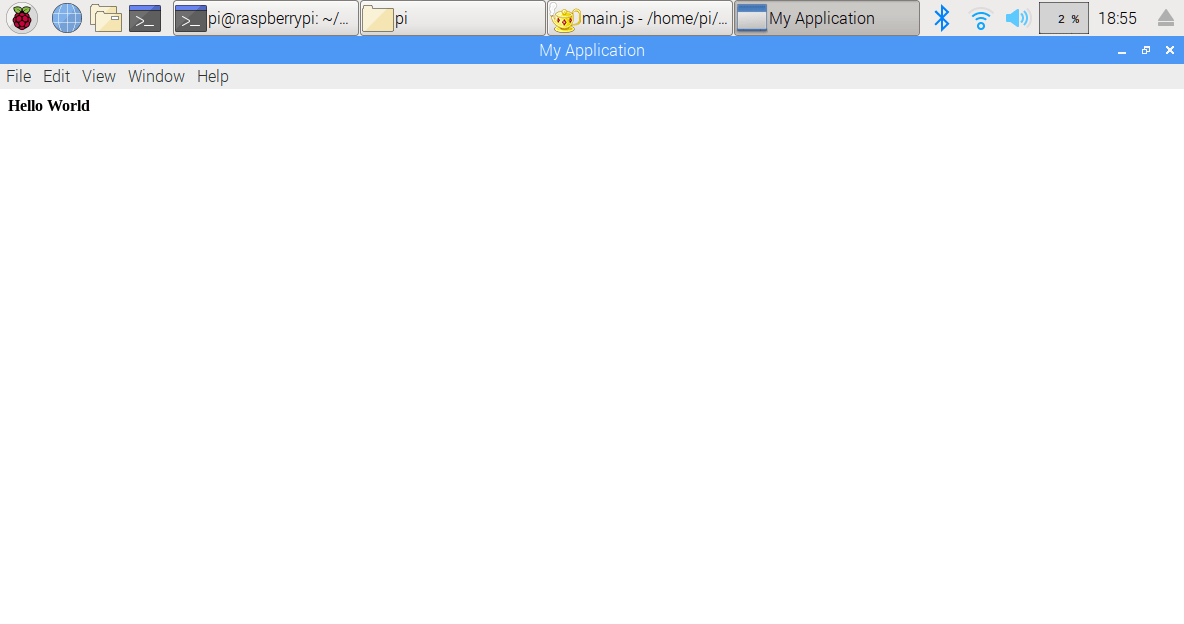
The first file we want to create is called index.html, containing the following HTML:
<!doctype html>
<html>
    <head>
        <meta charset="utf-8">
        <title>My Application</title>
    </head>
    <body>
        <b>Hello World</b>
    </body>
</html>
The second file is main.js, with this JavaScript content:
const { app, BrowserWindow } = require('electron');

app.on('ready', function() {
    var mainWindow = new BrowserWindow({
        show: false,
    });
    mainWindow.maximize();
    mainWindow.loadFile('index.html');
    mainWindow.show();
});
Running the Application
We are now ready to try running our application. Return to the terminal and enter the following command:
npm test
If all goes well, your Electron application will launch successfully!